
Having a personal creative studio is a dream for many.
New photographers often wish for a home photography studio to practice their art to their heart's content and create visual magic for the world to enjoy. However, when they research the hassle and the money it takes to bring together a studio, they shut their doors on these dreams.
Are you also one of those photographers who want to have a home studio but don't have the right knowledge to see it through?
What if we told you it's easier than you think? Don't believe that? Here's a comprehensive guide to easily setting up a fantastic home photography studio. Let's check it out!
Studio Setup
First things first, before going out and spending any money on your home photography studio, you must ask yourself a few important questions. Why do you want to set up a home studio? What will it help you achieve? Answering these questions will help you realize your goals and plan for a home studio more clearly.
For instance, if you are an infant photographer, the newborn photo props will likely fit in a small space, so you might not need a large studio. On the other hand, if you are into clicking family portraits, you might need a little more than the storage room space for your studio.
Don't forget to ask yourself what your style of photography is. You don't want to set up your studio in your basement when your entire portfolio is full of fresh sunbathed photos.
Budget
When budgeting for your home studio, start by listing down equipment that is highly essential for you to make the studio functional. These can include cameras, lighting, lighting, etc. After that, do some offline and online window shopping to figure out how much all this will cost you. If the total expense looks like something, you can get behind, then great.
But if you feel like these studio essentials might burn a hole through your pocket, you can consider buying second-hand products. You can also watch some tutorials on how to DIY some of the things you need in your studio to keep the costs low. Another way to cut costs is to avoid buying lighting equipment and using natural light to power your photos.
Interior Design
We only think about wallpapers and ceiling art when we think of an interior design. However, as a photographer, you want to think about having an interior design that helps you use your space efficiently and makes your tasks easier for your home studio. To achieve this, understand your requirements and workflow and add elements.
For example, if you are a food photographer, you might need to set up a little area that mocks a functional kitchen. Or, if you often take baby photos, a separate cabinet for newborn photography outfits can be a worthwhile addition to your space. For the aesthetics, make sure the wall designs of your studio match your personality and the type of photography you do.
When doing your studio's interior design, don't forget the floors. Your floors act as light bouncing surfaces, and that might not be a great thing when you're trying to control every ray of light that's touching your subject. So go for marble panels or clear granite for less bounce and more elegance.
Lighting Equipment
Although natural lighting is great in most cases, you might be forced to use artificial lighting in your studio sometimes. You want to prepare yourself for these times by having some important lighting equipment handy.
Speedlights
Pro photographers use speedlights to create bright flashes and deep shadows by blocking the sun. If it's your first time buying speedlights, you can start with two or three manual speedlights for maximum flexibility while shooting. These are also lightweight and highly portable.
Strobe Lights
Strobe lights work the same way speedlights do, but they provide much more light and control in light manipulation. They are relatively costlier too. You should get these if you need to work with a softbox or octagonal diffusers.
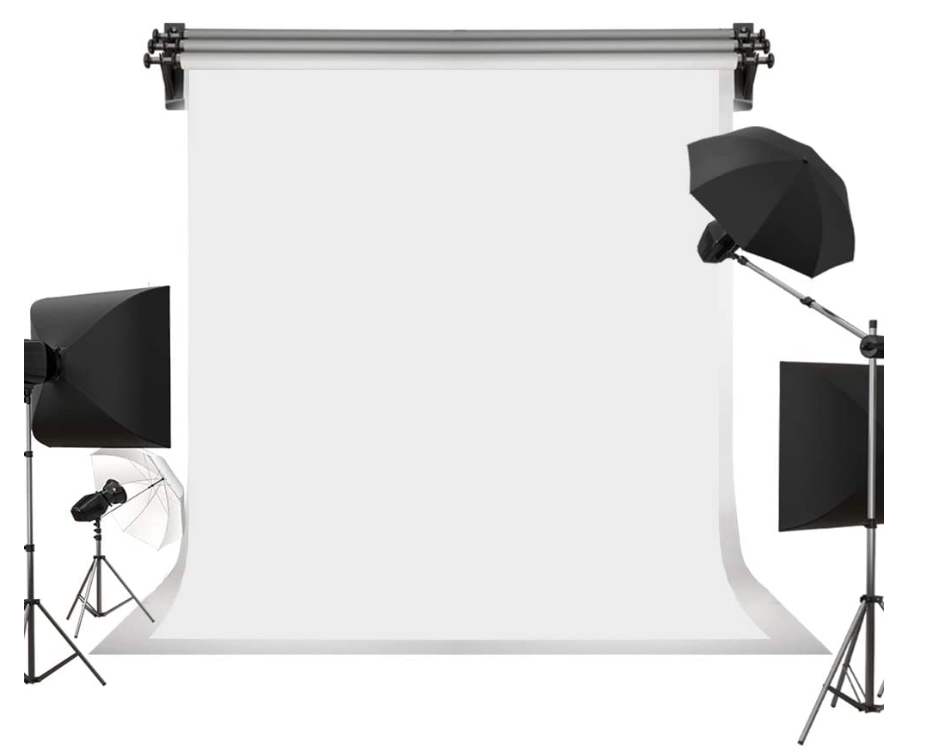
Backdrop
Backdrops are more than just making your photos look pretty. The right backdrop in your studio will help you cut down on post-production effort, and better control the reflected light's behavior. There are mainly two backdrop options for home photography studios.
Collapsible Backdrops
A collapsible portrait backdrop is made of paper or cloth material. Such backdrops are comparatively cheaper and come in a portable package. Collapsible backdrops are usually smaller and most suitable for taking headshots or single-person portraits. They can be folded in a compact arrangement. You have to be very careful while working with these because they are susceptible to creasing and damage.
Professional Portrait Backgrounds
You can get professional portrait backgrounds in various sizes as per your needs. These are not so compact and portable because they're pretty heavy. But you can find various designs like floral backdrops and abstract backdrops. So, they're best for photographers who have a fixed studio and don't need to carry their backdrops around for outdoor shoots.
Modifiers
When setting up a photography studio, getting lights isn't enough. You should also get light modifiers that can help you control the spread of light to show your subject in the best possible way.
Here are a few modifiers you can get to diffuse bright lights.
Umbrellas
These are the light modifiers you want to get if you are on a budget because they are easy on the pocket and get the job done pretty well. Some umbrellas are made of translucent material and work by softening the light from the flash.
There are also umbrellas with shiny surfaces to even out the reflection of light falling on the subject. Umbrellas, in general, might not be great for small studios because their light spillage is quite a lot.
Softbox
Softboxes act like umbrellas in a way that they produce a softer glow on the subject. They are a little costlier than umbrellas because they allow you to control the light more efficiently.
Gels
If you want cheap equipment that allows you to change the color of your light source, you can get gels. These sheets of semitransparent material introduce funky light effects in your photos by casting colored reflections.
Scrims
Scrims are also flat screens placed between your subject and the light source to diffuse or reduce light. They come in different colors and sizes and are pretty low-cost. However, it would help if you did not use these for professional photography since they don't produce a great finish. But you can experiment with them when starting.
Over to You
Whether you want to take your photography hobby to the next level or expand a pre-existing photo business, setting up a home photography studio can help you thrive. Having a studio at home allows you to cut overhead costs and better control your creative process. And what all do you need to build one? Just the right amount of guidance with a whole lot of willingness.
We hope this article helps you take the first steps towards building your home photography studio with ease. After all, it's not about achieving perfection on the first go. It's about getting started and building your dreams as you go.